

(click any pic to enlarge)
In order to check my improved design, I am hand building a number of prototype versions. I am checking to see that everything fits while also improving some of the methods so that I get better results in less time.
I call this 2x2 foot (60x60cm) shorty version "the hot dog cooker" or "the marshmallow toaster". It should do a great job at either task. A solar concentrating trough collector this small could be the basis for a science fair project or could be step one for someone who is interested but wants to build a small test model first. The shorty is not finished. To be done: a stand that allows aiming and a skewer holder for the hot dogs or marshmallows that will line up along the focus.
The reflector sheets I am using for these prototypes are old and some are damaged but they have the correct size and they have accurate square corners which is what I need right now to check fit. Later I will be substituting different types of reflective material: foils, polished metal or mirrored plastic sheets. They should all fit and be held in place firmly and accurately the same way - formed against the parabolic shaped and carefully made top surfaces of the ribs. The side channels hold the sheet in place and lock to the ribs to make a very light yet strong and accurate assembly.
On shorty above, I have mounted aluminum window screen. For demonstration and photo purposes, the screen makes it is easier to see the construction, otherwise you'd have to look at both sides.
I could mount reflective foil or a matrix of smaller shiny (perhaps recycled material) reflectors to the screen and have them line up by their position on the now parabolic shaped screen so that they aim, on average, at the focal line - the collector. I will show you that as I progress.
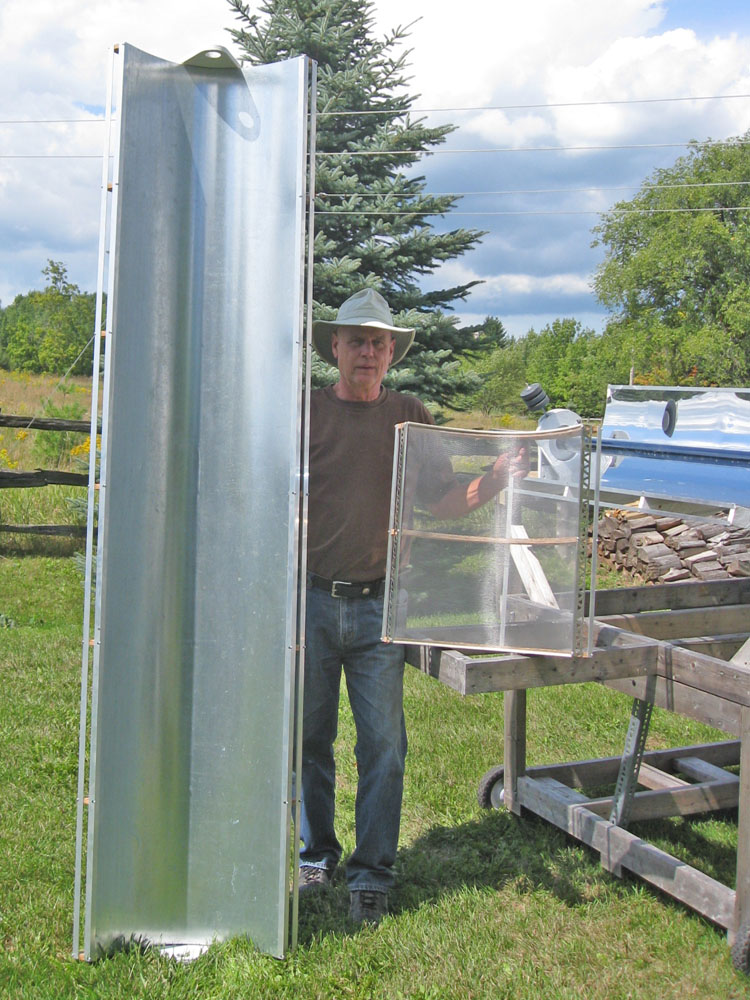
Here is a family portrait taken today. I have the first eight foot (244x60cm) version assembled and I am very pleased with it. This will be a drop in replacement for the reflectors described in my book but much easier to source materials and easier to build. I intend to replace all of the reflectors in my current swimming pool heater with this design. The ribs for that job will be CNC cut.
The shorty is in the middle and the four footers are in the test rack at the right. Because of the length (180cm) of the glass evacuated tubes that I have available there may be a need for a six foot version as well but the only things that need to change are the side channels and the reflecting sheet.

This will show the good degree of fit I am able to achieve with the hand made ribs between the reflector sheet and the parabolic curve on the top of the ribs (these are upside down). The better the fit, the better the focus pattern and the resulting heat capture. I am using a pattern technique which I will describe to make the near identical parts. But making them with CNC will still be a lot easier. If you are only making a few ribs, like the three required for the shorty, making them by hand is a perfectly adequate way to make them.

Here is another encouraging test showing the parallelism of the two ends of the eight foot reflector. The two sticks resting across the two ends of the reflector when viewed from one end should be parallel. If you compare the two as shown by the arrows, I think you'll agree that the camera has caught it pretty well. There was no adjustment required on even this first hand made one. It went together square and true. In the book, I described a "tuning" procedure to get the reflectors to this state. With Gen2.0, this seems to be unnecessary.
Thank you for your interest.
George Plhak
[to the gen2 intro and reading list]

No comments:
Post a Comment